 pyomn
pyomn
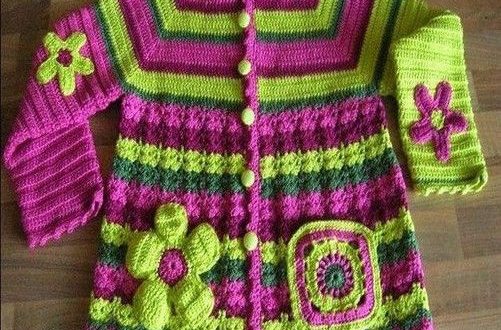
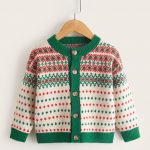
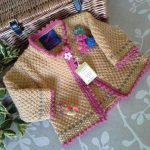
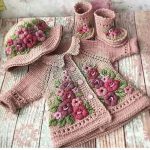
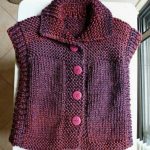
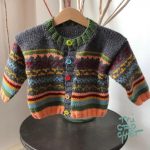
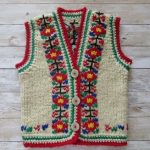
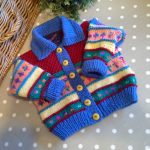
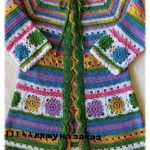
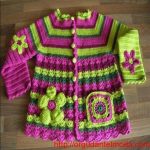
Creating cute baby vests knitted with colorful wool can be a delightful and rewarding project. Whether you’re making it for your own child, as a gift, or for a charitable cause, here’s a basic guide to help you get started on some adorable models:
Materials Needed:
- Yarn:
- Choose soft, baby-friendly yarn in various colors. Opt for materials that are gentle on the baby’s skin, such as cotton or a soft acrylic blend.
- Knitting Needles:
- Select appropriate knitting needles based on the yarn weight you’ve chosen. The yarn label typically provides a recommended needle size.
- Buttons or Snaps:
- Choose cute and safe buttons or snaps for closure. Make sure they are securely attached to avoid any choking hazards.
- Tapestry Needle:
- Essential for weaving in loose ends and sewing pieces together.
- Stitch Markers (Optional):
- Useful for marking specific points in your knitting, especially if you are following a pattern.
Steps:
- Select a Pattern:
- Choose a baby vest knitting pattern that suits your skill level and preferences. Look for patterns that include step-by-step instructions and any necessary charts.
- Gauge Swatch:
- Knit a small gauge swatch to ensure your stitches match the recommended gauge on the yarn label. This step helps prevent size discrepancies.
- Choose Colors:
- Pick a color palette that you find cute and suitable for a baby. You might want to go with pastel shades or mix in some bright and cheerful colors.
- Cast On:
- Cast on the required number of stitches according to your chosen pattern and size.
- Follow the Pattern:
- Knit each section of the vest according to the pattern instructions. Pay attention to any shaping or stitch variations.
- Add Stripes or Color Blocks:
- To make your vest even more colorful, consider adding stripes or color blocks. You can alternate colors at regular intervals or create a unique pattern.
- Shape the Neckline and Armholes:
- Follow the pattern instructions for shaping the neckline and armholes. This typically involves binding off stitches to create openings.
- Knit Button Bands or Edging:
- Add button bands or other edging as specified in the pattern. This could involve simple garter stitch or a more decorative border.
- Attach Buttons or Snaps:
- Sew buttons or snaps onto the vest for closure. Make sure they are securely attached.
- Weave in Ends:
- Use a tapestry needle to weave in any loose ends to give your vest a neat and polished look.
- Block the Vest:
- Blocking is the process of wetting and shaping the finished piece to ensure it lays flat and looks its best. Follow the blocking instructions specific to your yarn type.
- Personalize (Optional):
- Add any embellishments or personal touches, such as embroidery or appliqué, to make the vest unique.
- Care Instructions:
- Include care instructions with the vest, specifying whether it can be machine washed, hand washed, or if it requires special care.
Remember to have fun with your project and get creative with your color choices and patterns. Hand-knitted baby vests make for lovely, personalized gifts that are sure to be cherished.